Last week I got married(it was amazing and surreal). When planning the wedding we really wanted to make the whole night reflect “us”. This meant an all vegan menu from hearty catering(amazing) and a lot of elbow grease as we built and crafted mostly everything ourselves. Our signs were life sized pictures, the cupcake stand was wooden slabs of a tree and I build a photobooth which is what I’m going to talk about in this post.
The Alternatives
Looking on the internet I found that lots of people “built” photobooths by plunking a laptop on a table with some “photobooth” software. In my mind this was worse then nothing. Everyone owns a laptop and a webcam, whats the point in letting them use yours? What I wanted was to simulate(with as little work as possible) was the magic of a photobooth and the feeling you get from walking away with a small strip of memories to mark an event.
A Bit of Movie Magic
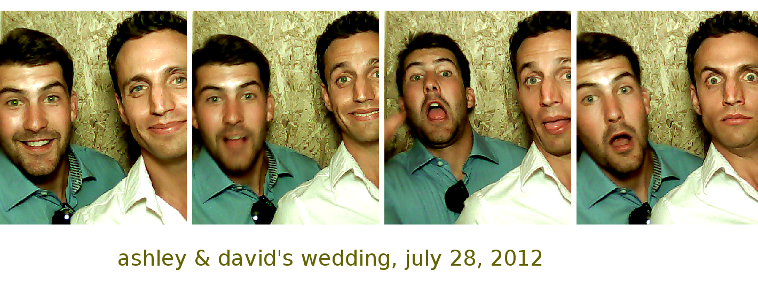
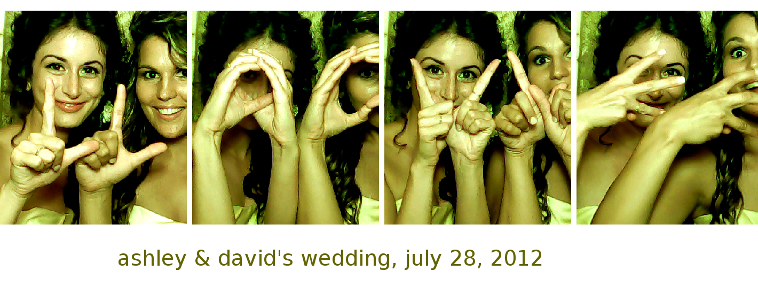
What the “magic” meant for me(never used a real photobooth so this could be way off) is you walk in to a dark booth, you push a button, the booth “speaks” to you and directs you in taking some pictures, you walk out and you get a convenient photo strip(not an entire page!) of well lit pictures to slip in your pocket.
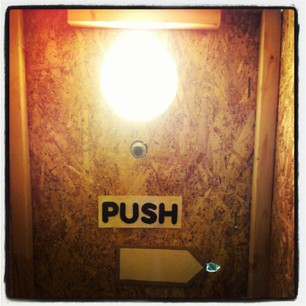
With that in mind my photobooths user flow starts when the user presses the main(and only) button(hacked apart usb keyboard). This triggers the main loop in the python script that drives the whole thing. It plays the introductory audio to explain whats going to happen, then it uses the python OpenCV bindings to grab our first picture and makes a shutter sounds. This cycle repeats 3 more times and then the booth directs the users to leave and pick up their strip outside. The strips are automatically printed on strips of photo paper that are pre-cut. The strips are the width of an envelope since thats the narrowest that most printers can support repeatedly without any screw ups.
The beauty of this booth is that from the users perspective its more then what it really is. Like real photobooths its a magic box. The picture quality is great because you can control the focus and lighting of the booth and the result is a cool take away.
- as a little extra the booth also says hi/bye as people enter and leave the booth, just to be friendly.
The Code
I wrote my booth in Python 2.7. You can find the code here in my github account. I used OpenCV to interface with the webcam, the PIL to manipulate the images and build the photo strip and some cool printing tricks I learned about here.
Usage
 Running the python script will start an openCV loop which will connect to the first webcam on your system. It will display the webcam feed in a window so you can focus your webcam and make any adjustments. Pressing the spacebar will trigger the photo strip process. Audio will be played from the sounds folder and the pictures will be taken. Then the photostrip will be created. It will create a color version of the strip and save it in the /images/color folder and it will create and print the greyscale version. It will then archive the full resolution originals in the images/originals folder. After that it’ll be ready for the next user.
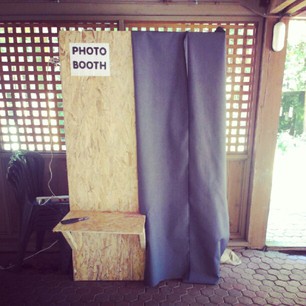
Building the Booth
My booth was pretty basic but it worked out pretty well. The whole thing was made from 1/4’ OSB and 2 * 2’s. I drilled small holes in the ceiling for the speaker audio to come through. Mounted a recessed light fixture covered with wax paper for a soft light source. The webcam was mounted in the same way but I learned that people get pretty rowdy in photobooths so I would recomend shielding it with some plexiglass. The curtain needs to be thick enough so that you don’t have any external light seeping through. This way you can totally control and adjust the lighting to take some really nice/consistant pictures.
The End
Having a photobooth at a wedding(or anywhere) is a ton of fun. Your guests will have a blast cramming in and creating memories. Get to work.